a little bit of Donkey Kong on the old Atari 2600 I got inspired to create a fantastic
new quilt for all of you. Its a Pixel quilt and Im ready to get
started. Thats right music fans. You know me and you know how much I love my
music.
And funny enough these pixel quilts or watercolor
quilts or color wash quilts its all the same style, all the same method. But I love how were going back to some
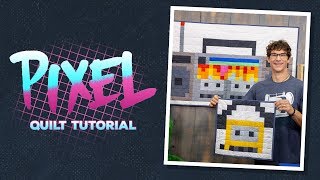
of the 80s style artwork to make these really fun and kind of modern quilts, right? So now this quilt here is my double cassette
boombox. And what Im going to teach you is going
to show you exactly how to make this. But this one is a little bit bigger to be
working on quickly on the set today.
I have a portable version Id like to share
with you. Thats right everyone, the old cassette
player. I believe it was called the Walkman. At any rate were going to give you this
fun printable right here.
Weve got a pattern for the boombox. But we also have printed out nice and small
for you if you want to count out the squares you can. And thats all it is. Its just a counting of the squares and
laying out your stuff.
However theres a really easy trick. No were not going to sew all of those two
inch squares together. Were going to fuse them first just like
this. Now my dear friends over at Quiltsmart have
this fantastic interfacing.
And it is, its a super lightweight interfacing. And Im hoping you can tell there are grid
marks on it. And they come in different sizes. Were using the two inch squares here.
But the cool thing about a pixel quilt is
you can do any different graphic design just by changing it. And another place that I saw a lot of cool
inspiration was kind of looking for perler bead designs is another great place to get
inspired for making your own pixel quilt designs. However lets talk about this real quick. The packaging comes in panel sizes.
And the panels may be spliced together one
of two ways. Its such a lightweight interfacing that
if I need to make a larger, because this is over the back of everything. I guess I forgot to tell you that, this is
the back of everything. I need a larger piece.
I can do one of two. I can overlap one entire set of grids and
then build out my design this way. Or even better what I like to do is I will
build my entire design on the two individual pieces. Because later on after everything is fused
down were going to fold along these seam lines and stitch.
So basically what Im saying is we can build
a half a quilt and another half of a quilt. And then we would lay them with their right
sides together, make that quarter of an inch seam and it would join the two half quilts
after theyve been fused. Maybe youre not quite following along yet. Maybe I should show you what were going
to do and how were going to fuse it.
So Im going to bring this over a little
bit closer here. And Im using the Robert Kaufman solids. I just love this bundle of fabric. I picked it up so I could do a bunch of different
quilts with it.
And youre probably seeing that in some
of the tutorials that have been coming out lately. And what Ive done now is Ive taken my
printable and Ive counted out my squares. And you can see that Ive drawn onto the
fused side. And the fused side theres a little bit
of a bumpy texture.
The other side is really nice and soft. It actually feels almost like Kleenex. So this rough side is the side that I want
up. And because its up Im going to be able
to go ahead and just count out my designs and start to sharpie marker onto the grid
line.
Now I want to make a big point out of that
because some of our fabrics like the ones I used in the background are white fabrics. And every now with like a white or a pink
or a pale yellow you might get some bleed through. Now were going to be folding along these
grid lines. So that will be in the seam allowance.
It will never be seen in the front of the
quilt. But I dont want you to take the time to
write on here any of your color names because if you write your color names that wording
may show through later on. So just take the grid out like that. And then youre just going to go ahead and
follow the pixel diagram to go ahead and start laying your pieces where they go around the
quilt.
So Im going to start in the center where
the cassette is. And I wanted to point out, now this is a legitimate
project, right? Because the cassette here that you have will
certainly fit in one of the two dub sides on our boombox. So you can make yourself your own dance and
party mix for your quilting studio, right? At any rate Ive got my pre cut squares
because it makes it so fast and easy to go with my dark fabrics. And so Im just kind of like to go through
and pick out the ones I need and Im just going to place them.
Now with our placement we dont have to
be super particular yet. But I am going to take a little time and fuss
once all of the pieces are in place. And if you ever find that something is being
a little precarious you certainly could use like your clover mini iron and just touch
the centers to hold a piece in place for some reason if it was moving around but I sure
found that everything bonded very nicely to my quiltsmart. So Im going to go around and put all of
my squares down first because Im going to need to press it all at once and I want
to show you how to do that before we can go over to the sewing machine.
So I tell you what, let me finish this up
and Ill be right back. Welcome back, Ive got my design all laid
out. And I didnt quite point out but I left
kind of my half squares up here just loose. So Ive finished all the way to the edge.
But there is glue up here so as I get ready
to iron and glue down here hanging off the edge of the board. So as I get ready to iron what I really want
to do is I want to go through and adjust any squares. And Im using my little metal stiletto or
a purple thang or a heck a toothpick would probably work. But I just want to make sure that theres
not big areas of glue showing through.
If theres a little bit of overlap in a
spot it wont be a big deal. But Im just making sure that it looks as
tidy as possible. Then Im going to come back into the center. And Im going to go ahead and like press,
press.
And Im going to start bonding down all
of these layers here of my little two inch squares or whatever size youre using for
your grid. And once I get it fairly pressed down I am
going to glide the iron over it one more time. We want these pressed down pretty darn securely
because were going to be folding along each one of those printed grid lines that
was there. And running these through the sewing machine
so that we dont have to sew each little two inch edge together.
Thats how it was originally done. Now Im going to give a little bit of steam
in my iron to get it good and hot because now you can see Im kind of gliding over
here just to make sure that everything is secured. And were almost ready for the sewing machine. It doesnt matter what kind of thread but
Im going to use cotton.
It doesnt matter which color. And what I like to think about if I want to
find the long seams first. This little unit I believe was an 11 by 12. So basically Id be folding the 12s instead
of the 11s.
On the boombox I made all of the long seams
first as I was going across because it secures two sides of our squares so if pieces want
to start to fall off because of just the size that we have then we can kind of capture them. Once we get all the verticals done we have
those last rows and everything is secured. Ok Im ready for that machine. I bet you are too.
Now Ive got a quarter of an inch edge guide
on the machine. Im going to fold this so its right sides
together here and I like to do a little finger crease. And I can see already that that first square
slipped away from me. You probably caught me there.
No problem because Im going to the machine
right now. If other ones are falling off were going
to want to secure those. And thats simply because I rushed through
the ironing but you would not be doing that. Im going to look at that gridline.
Im going to lock in my stitches us here,
capturing that one little loose square. Were going to sew all the way through the
end. Might as well use your thread cutter if you
have one. Now Im just going to keep working from
the machine.
Im not going to start pressing these seams
back open. Oh my goodness. I guess I better take a minute and hit this
one more time with the heater because what Im going to show you is the next fold over. And I was just going a bit too quick.
Now my steam is kicking in. Thats going to be good. That steam really helps on this interfacing. I had the steam turned off on the iron in
the first time.
So if youre wondering what the heck is
that guy doing today. Simply just going a little too quickly. One of my mantras recently has become thinking
about the journey not just the destination. So getting all of this set down properly is
that journey not just the finished product us all.
Now were going to come back and were
going to fold what would be the 2nd and 3rd seam lines together. And this one is going to go pretty good. But the next maybe two seam allowances I need
to be careful that this first square doesnt start to curl underneath and start to tuck
underneath. I wont explain how I found that one out.
And it wasnt on this but it was years ago
I did. Oh no, now you know how I found it out anyway. So another quarter inch seam. Were going to blow through this pretty
quick.
And now you can see how great my squares are
holding once I got that steam nice and hot in there. And as I said Im literally just going to
go through and Im going to sew all of these rows one after the next after the next after
the next so that when it is all done it comes back out of the magic of television. And its getting a little shorter in one
direction. But what you can see here now I have all of
these folds done.
Now theres a couple of different ways to
address this. Im going to teach you the proper way, industry
standard, which is going to go ahead and create a snip at each fold like yay so I can fan
them backwards. So I have one layer to still do. And what I found was that if I could get an
ironing surface that I could then just kind of put over the edge, then you could see how
that folds.
Or I used the edge of my table at home. And then I could just go through and I could
just snip, snip, snip. And you can use scissors or snipers. You want to make sure you get all the way
through.
And heres the cool thing. You could actually cut through those threads
that you did already. Not too far but were going to go ahead
and sew this direction. So even if you hit the threads its actually
be better than being short.
So Ive got to get all of these cut through. And of course Im using a pretty small pair
of scissors. But all of the rest I did at home for us. So now were ready to go back on over to
the sewing machine and were going to sew the other direction.
So now here Im going back to what would
be right sides together, correct? And what I really want to point out is Im
going to take the time to make sure each seam is folded or fanned in opposite directions. So as I approach the machine right now I have
my little stiletto handy because thats also going to help. And Im pushing the upper seam up and the
bottom seam down. It makes it easy to see.
But the next row thats going to be opposite
because that seam is already going to be set in the down position. So let me see if I can do this a little slow
so you can understand. Ok. This seam is coming down, this seam is going
up.
And I like to have my little stiletto handy
so I can just lift under and keep it real flat. And what thats doing for us is its keeping
the bulk management in our favor so when we machine quilt we dont have to avoid those
corners. Thats basically the reason. So you can see this pace is much more precise.
And thats why the quilt on the back wall
behind me looks so terrific because all the squares are kind of stitched this way instead
of individually. Ok, almost done for us. Go all the way to the end please. Now with that being said lets point out
what I was trying to say here, now these seam allowances here have started to criss cross
or fan open.
When I go to do the next row Im going to
pinch it and fold it. But this part here has already been pressed
up. So then its still going to press up so
then the next one is going to press down. So Im going to come back over here and
Im just making sure that I get off to a good start on the first one because I let
my eye look up to the seam I just created to make sure that the next one is going correctly.
So thats now going up. Thats going down. And thats all youre going to have to
do to get your pixel quilt all stitched together onto the interfacing. So lets finish this out and Ill talk
you through the rest of it.
And you can probably see how much better the
seams start to go once the other side had been created. It started to fold over for you. So as a reminder youre going to do now
all of the rest of the other direction. And youre going to leave the interfacing
in.
Theres absolutely no way to remove it let
alone reason to. It adds a little bit of a body to our quilt. And then if you will follow me back over here
to the quilt sample itself, right? And like I said I did do stitch in the ditch. But I didnt do every single row.
And I used some white thread hoping it would
pretty much hide. And for the most part it really did. So basically I counted across from the center
over and basically did every other row down and then every other row across it. Then stitching here, not here, then here again.
And that holds it together but it doesnt
make it too compact. So it still has some nice loft to it. But of course this would be a fantastic place
to go back in and free motion machine quilt. I think I probably better do some play and
some pause buttons which I know you all use so that you can stop, watch what weve done
and follow along in your own home studios so that you can enjoy all these great projects
right here at Man Sewing.
Thanks for being a Man Sewing fan. Its great to have you out there encouraging
me to create fantastic new content. If youve missed any of the videos weve
got links for you here and here. And when youre checking those out make
sure youre subscribed.
We dont want you to miss any of the action..
No comments:
Post a Comment